
If you've chosen to include back pockets on your trousers, you should know that there are many different techniques for making double-welt pockets and many experts swear up and down by their methods, but for whatever it's worth, we've tried plenty of them and this is the method we prefer.
Begin by cutting a small rectangle of fusible interfacing about 6 ¼" by 1 ¼". We recommend cutting it with pinking shears ("pinking" it), thus minimizing the effect of strong, linear imprints on the right side of the garment where the edges of the interfacing are, better obscuring it.
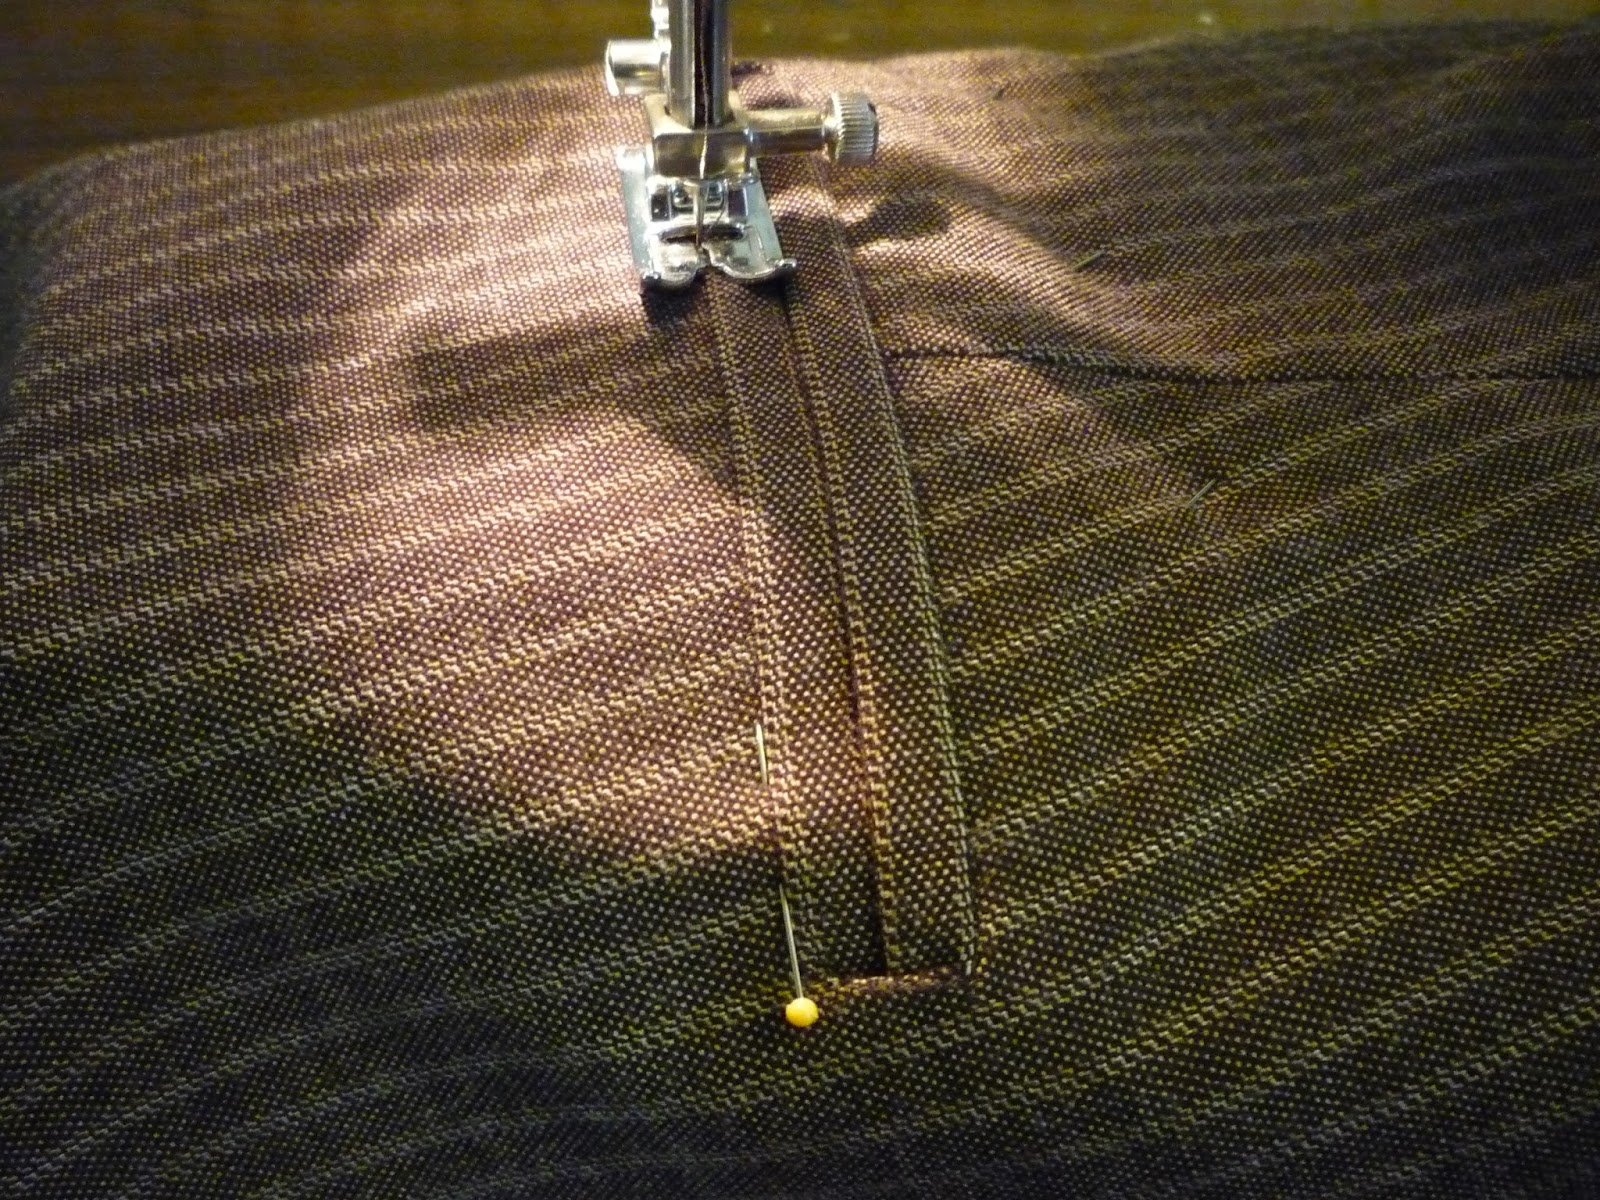
Using a disappearing ink fabric pen, draw a rectangular box onto the fusible interfacing, 5" by ½". (This will be your pocket opening.)
Fuse the interfacing to the wrong side of the back trousers, aligning the corners of the box you just drew with the pocket placement guides on the printed pattern.

(If the pocket opening you drew fades or begins to disappear after the fusing, simply redraw it as accurately as possible.)
Stitch over the pocket opening, shortening your stitch length to 1 around the corners.

If you're using plaids, however ... well, the cutting process is quite a bit more involved, as both the horizontal and vertical the plaid patterns should flow continuously from beneath the pocket, across both welts, and to the top of the pocket opening.
As if that weren't enough of a challenge, the dart above the pocket "warps" the plaid pattern slightly, so a tiny bit of easing may be necessary on the upper welt!
Nevertheless, we'll walk you through the process here, demonstrating with our Joker-style trousers.
 Turn the trousers back right-side-up, so the topstitched pocket opening is visible.
Next, place a cut of leftover fabric over the upper back of the trousers, wrong-side-down (so both are right-sides-up), matching both the horizontal and vertical plaid patterns.
Locate the corners of the pocket opening and either mark them using tailor's chalk/disappearing ink fabric pen or tailor's tacks, then connect the corners (forming an identical "pocket opening" box on the second piece of fabric).
TIP: The corners of the second rectangle ("pocket opening") should be in exactly the same place as those on the topstitched pocket opening on the trousers back.
TIP: The corners of the second rectangle ("pocket opening") should be in exactly the same place as those on the topstitched pocket opening on the trousers back.

Set the trousers back aside so we can now focus on properly cutting the welts.
Using your tailor's chalk or disappearing ink fabric pen, draw a line down the center of the rectangle on the second piece of fabric, effectively dividing it in half (the long way).
Draw a line 1⅛" below (and parallel to) the center line, and another 1⅛" above (and parallel to) the center line. The distance from the bottom line to the top line should be 2 ¼".
Extend the "sides" (the short edges) of the rectangle by ⅜" on each end and draw a line on each end.
Essentially, you've just enlarged the original rectangle by ⅞" on the upper and lower edges, and ⅜" on the sides.
Cut out this larger rectangle.

Now cut out another, identical rectangle - and I do mean precisely identical.
Although unfinished, these will be your two welts.

Press the welt in half the long way, wrong sides together.


Repeat for the other welt.

Observe that the pressed edges of the two welts match when placed together, and, more particularly, when placed on the trousers back, centered over the pocket opening, the plaids match those on the trousers!

To form your lower welt, first unfold one of the pieces.
If you wish, on the wrong side, draw a line down the center (the long way), along the creased edge. You may also wish to press the welt flat before doing so.
Draw a line ⅝" below (and parallel to) the center of the rectangle, and another ½" above and parallel.

Trim the welt down to size along the upper and lower lines you just drew.

To form your upper welt, it's basically the same process, but in reverse; that is, draw a line ⅝" above and parallel to the center, and the other ½" below and parallel.


And there's your upper welt!
Now, when you fold the welts back down on the (original, but no longer center) lines and center the folded edges over the topstitched pocket opening, you'll see that both the horizontal and vertical plaid patterns properly align to those on the back trousers!

Unfold the welts (marking and/or remembering which is which, of course!)
Okay, everybody not working with plaids can wake up now!
OPTIONAL: Using tailor's chalk or a disappearing ink fabric pen, draw a line down the center of the topstitched pocket opening (the long way).

Center the two welts over the pocket opening, right sides down, and pin into place on the upper/lower edges.

TIP: If you're making plaid trousers, thoroughly hand-baste the welts into place along the upper and lower edges of the topstitched pocket opening to ensure that the plaids will match once the welts are attached!

Also note that, when placed right sides down and centered over the topstitched pocket opening, the welts' plaid patterns will appear to be all weird and "off," but it's actually supposed to look like that, so don't worry!
From the wrong side, stitch over the long lines of the pocket opening again through all layers, beginning and ending exactly at the corners of the topstitched pocket opening.

TIP: If you're making plaid trousers, baste the welts on first and only sew them on once you're satisfied with the plaid's proper alignment at the stitch lines!
Turn the trousers right side up again and press the pocket opening.

Press the lower welt upward.

If you're making plaid trousers, the plaid pattern should flow continuously from the trousers over the stitch line and onto the lower welt.

Unfold the lower welt and press the upper welt downward.

If you're making plaid trousers, the plaid pattern should flow continuously from the trousers over the stitch line and onto the upper welt.

Unfold the welts and slash the pocket opening down the center, stopping about ⅜" from the ends and snipping a "Y" shape to the corners on each side, catching only the garment fabric (not the welts!).

TIP: Be sure to clip all the way to the corners, but not past them! Sharp scissors are essential for this!
Pull the welt fabric outside the stitch lines through the opening to the underside of the trousers.


Press the underside welt fabric flat so that the folded edges of the welts meet at the center of the pocket opening.

Turn the little triangles under along the pocket opening's stitch line and press.


TIP: If you have large hands and/or fingers, you may find it somewhat difficult to pull the triangles under in precisely the manner they need to. We've found tweezers to be enormously helpful for this task!
On the wrong side of the trousers, place the smaller back pocket pouch (piece S) "upside down" (that is, with the bottom of the pocket upward, toward the waistband) and with its lower (upper) edge flush with the raw edge of the lower welt.
Baste or pin the pocket pouch into place.

On the right side of the trousers, "stitch-in-the-ditch" along the bottom of the lower welt through all layers to secure the pocket pouch to the pocket opening.
Press the pocket pouch downward.

A nice feature that I (Alex) like to add to my trousers is a button/button tab ("loop") to secure the pocket closed.
This step is entirely optional, as many back pockets do not have this particular feature, which is fine.

But I really like to go the extra mile and add this special touch, because it not only adds functionality but also looks quite snazzy when done well!
If you wish to incorporate this feature into your trousers, good for you!
The method we'll be sharing here is basically the same as Roberto Cabrera's in his amazing book Classic Tailoring Techniques for Menswear (see our "Recommended Reading" list).
Attach a ½" button at the lower center of the bottom welt (at the stitch line).

TIP: Pin or tailor-baste the pocket pouch out of the way so you don't accidentally catch the pocket fabric in any of your stitches from here forward, unpinning as needed!
For striped fabrics, cut your back button tab (piece U) vertically centered over a stripe.
For plaids, do the same, but decide which portion of the plaid you want visible and center the button tab over it.
Fold your button tab in half the long way, right sides together (but don't press).
Sew the button tab closed with ⅜" seam allowance (essentially sewing halfway down the center).
At this point, you can trim the seam allowance and attempt to turn it if you wish, by whatever method you choose.
You may wish to try something like the Dritz Clip 'N Turn (see right), but I've always found that to be frustratingly difficult.
 |
 |
Instead, I prefer to cut my button tabs ½" taller and sew them closed at the top, ¼" from the top edge, as well.

 Then I trim the seam allowances down to ⅛" across the side and the top.
Then I use a little miracle gadget called the Dritz quick turn (see below) to turn the closed loop. It's much easier!
Once turned, clip the uppermost ¼" edge off of the top of the button tab and press it flat so the stripe runs exactly down the center. (If you're making plaid trousers, you'll need to clip ¼" off the top and the bottom of the button tab so the plaid patterns will match later.)
 |
 |
 Fold the button tab into an arrow shape and press.
If you're making plaid trousers, horizontally match the plaid patterns on the button tab as well.
From the wrong side, topstitch the button tab across the top edge of the lower "triangle."

From the right side, topstitch along the outer edge of the button tab.

Then topstitch along the inner edges of the tab, pivoting at the horizontal topstitch.

 TIP: Using tailor's chalk or a disappearing ink fabric pen, draw a horizontal line on the button tab ⅝" above the horizontal topstitch. This will make it easier to position the button tab accurately.
Slip the button tab into the pocket opening and position it so it's horizontally centered (above the button) and there's a ⅝" opening in the tab beneath the bottom of the upper welt. (If you made the horizontal mark we just recommended, simply slide the button tab upward until the mark is even with the bottom of the lower welt.)

"Stitch-in-the-ditch" at the center top of the upper welt to secure the button tab.

Press the upper and lower edges of your back pocket facing (piece T3) under ¼".


TIP: Ordinarily we like to enclose as many raw edges as possible to prevent fraying, but if your fabric is thick and/or you simply wish to avoid adding any unnecessary bulk, you can simply serge the top edge instead (rather than turning it under and pressing).
On the underside of the trousers back, position the back pocket facing over the pocket opening (right side down) and the upper edge of the facing flush with the upper edge of the welt fabric.


To determine the correct positioning for the facing, place the back pocket pouch (piece T1 or T2) over the existing assembly with the lower pocket edges flush and the pocket pouch top flush with the top of the trousers.


Topstitch the back pocket facing onto the pocket pouch.
TIP: Use pocketing-colored bobbin thread to avoid any unsightly contrasting stitching on the inside of your trousers!
(We're using contrasting thread in this tutorial so the stitching will be more apparent, but it'll look much nicer with matching thread on the underside.)
Position your back pocket pouch back into place.
Pin, then sew the pocket closed, catching the little triangles on each side of the pocket opening.


From the right side, "stitch-in-the-ditch" through all layers along the side and upper edges of the pocket opening.

Serge the perimeter of the pocket pouch.

Unless you plan on "period-tailoring" your trousers, sew or baste the pocket pouch to the trousers ½" from the top edges.

If you're making plaid trousers and did everything correctly, both the horizontal and vertical plaid patterns should flow continuously from the trousers, onto the lower welt, over the pocket opening, onto the upper welt, and then back onto the trousers.


Whip-stitch the pocket opening closed to stabilize it and prevent it pulling open during the remainder of the construction process.

Repeat for the other side (if you want a pocket on each side, that is!).

For SLANT POCKETS, continue to the next step.
If you're not doing slant pockets but you are doing front pleats, skip to step 6.
If you're not doing slant pockets or front pleats, but you are doing side pockets, skip to step 7.
If you're not doing slant pockets, front pleats, or side pockets, skip to step 8.
PREVIOUS: Tutorial, part 3 - Back Dart
No comments:
Post a Comment