
If you've chosen to make trousers with slant pockets in the front and you haven't done them before, they can be a bit weird to try to wrap your brain around at first, but they're actually quite easy.
To make these, you'll need the hip yoke (piece G) and pocket pouch (piece H), as well as their facings (pieces G1 and H1, respectively).
Here's a photo of how the yoke/ pouch will basically go together, to help you envision the finished pocket:

With the facings attached, the pocket will be as shown below in this "cutaway view":


Begin by serging every edge of the hip yoke facing (piece G1) except the lower one (you can if you wish, but it's not necessary).
Also serge the side (short) edges of the pocket pouch facing (piece H1).
Press the lower edge of the pocket pouch facing (piece H1) under ¼".
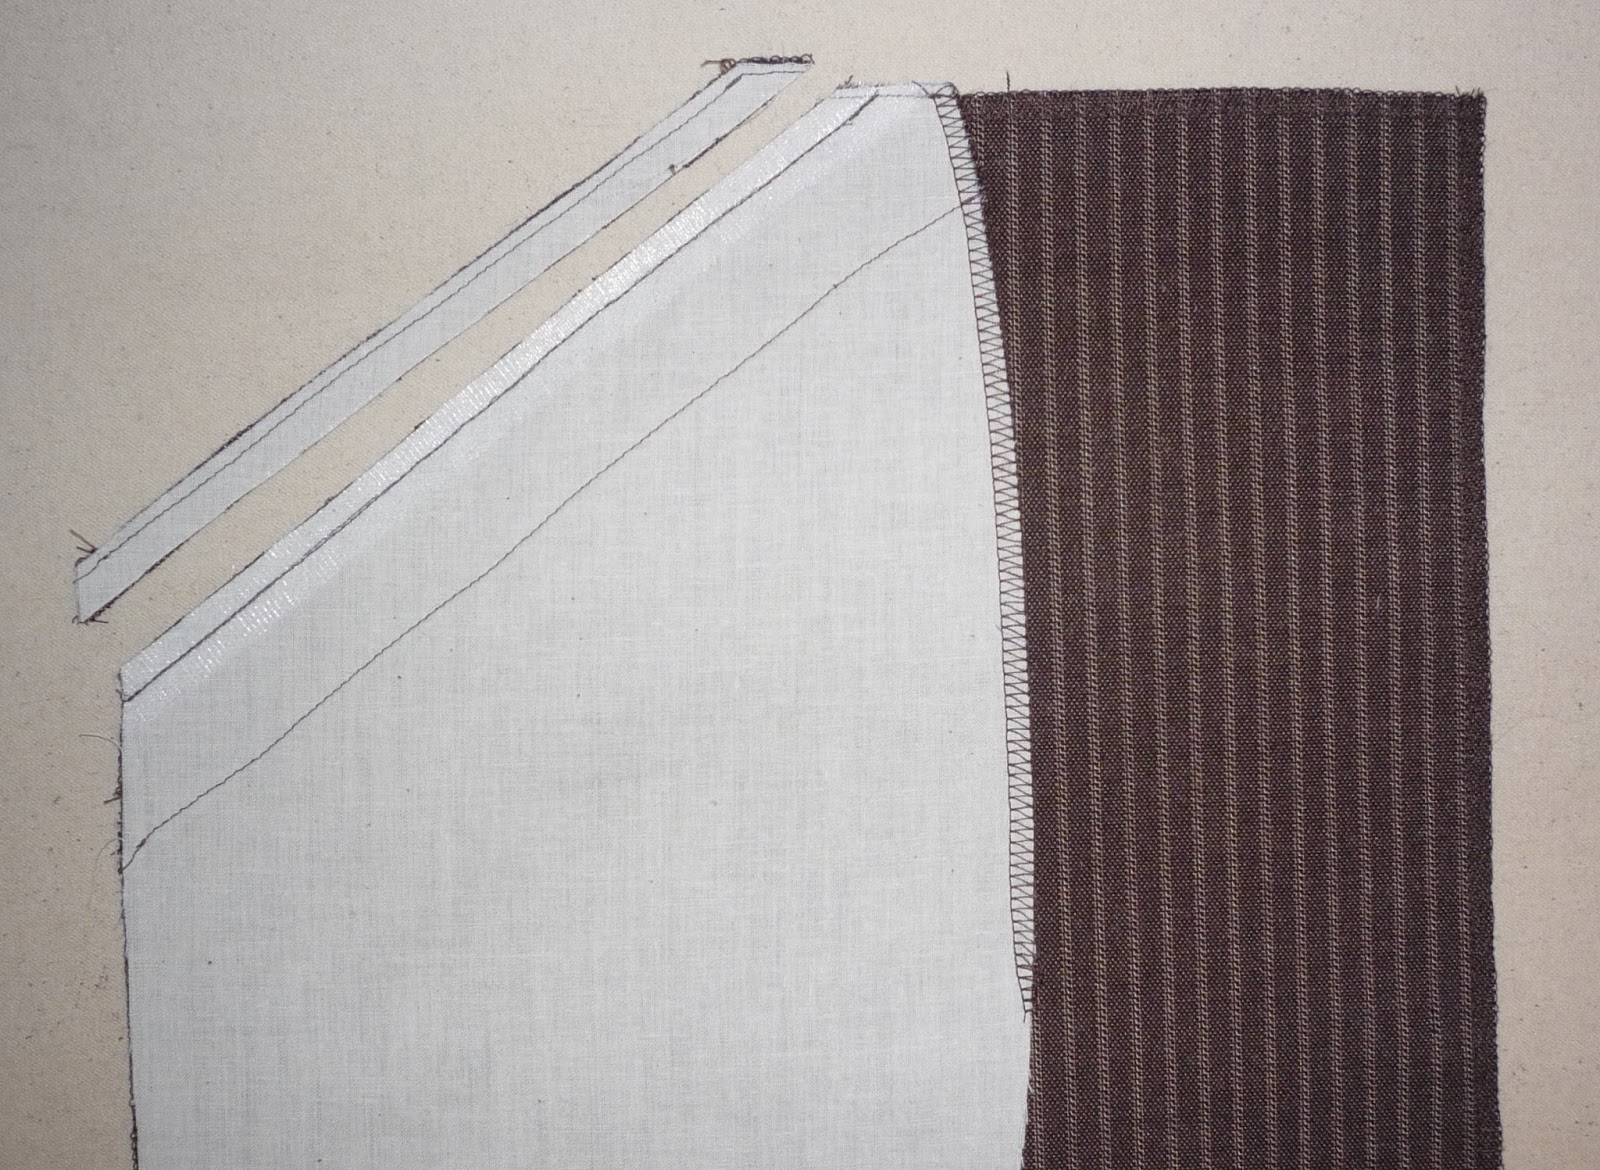
Position the pocket pouch facing on the top of the pocket pouch (piece H) with the upper and side edges flush, and topstitch it into pale around its perimeter.

TIP: Use pocketing-colored bobbin thread to avoid any unsightly contrasting stitching on the inside of your trousers!
OPTIONAL: Serge about halfway down the centermost (longer curved) edge of the pocket pouch.

TIP: Stabilize the pocket opening on the underside of the trousers front by sewing some stay tape over the seam line - that is, ⅝" from the upper diagonal edge (or ½" if you prefer to keep your stitch inside the seam allowance). However, you can do this all in one go when you attach the pocket pouch if you prefer. The stay tape will prevent the pocket opening from stretching and sagging open over time.
Baste the pocket pouch to the trousers front, matching stripes or plaids as needed.

Once satisfied of their proper alignment, sew the pocket pouch to the trousers front, stabilizing the seam line/pocket opening with stay tape if you haven't already.

Trim the seam allowance to ¼".
Press the pocket pouch (and seam allowances) upward and "understitch" the seam allowances to the pocket pouch/facing close to the seam line.

Note how the stripes all align nicely!
Press the pocket pouch under and topstitch the pocket opening ¼" from the upper edge.

Press the bottom edge of the hip yoke facing (piece G1) under ¼".
Position the hip yoke facing on the hip yoke such that the upper and side edges are flush, and topstitch the facing onto the hip yoke around the entirety of its perimeter.

Position the hip yoke underneath the trousers front/pocket pouch so the top and side edges are continuous.
For stripes and plaids, every effort should be made to align them as well, so the stripes/plaid patterns flow continuously over the pocket edge and onto the hip yoke facing. (This is why it's important to plan ahead when cutting!)
You want it to look like this:

Not this:

Once the hip yoke is properly positioned underneath the trousers front/pocket pouch, pin the pocket pouch and hip yoke together along the entirety of the pocket pouch's side and lower edges.

Sew the pocket pouch to the hip yoke along the pouch's side and lower edges.

At this point, you have two options for finishing the pocket.
The first, and easier of the two, is to simply serge the pocket assembly around its perimeter and baste it to the trousers along the top, side, and centermost edges.

Easy peasy!
High-quality and tailored trousers usually have a French seam, though, which encloses the seam allowances so no raw pocket edges are present on the interior of the trousers.
A neat alternative to that is simply "narrow-hemming" the pocket edges, which we'll demonstrate for you here.
First, trim the pocket pouch's lower seam allowance close to the stitch line.

Press the hip yoke's seam allowances upward ¼".

Press the hip yoke's seam allowances upward ¼" again, and pin the hem into place.

Hem the bottom of the pocket by topstitching the hem allowances close to the edge through all layers.
Press the pocket hem flat.

Serge the remaining edges of the pocket assembly, then baste it to the trousers front across the top, side, and centermost edges.

Your finished pocket should look something like this:

Sew the trousers front to the trousers back along the sides and press the seam allowances open.

Repeat for the other side.
PREVIOUS: Tutorial, part 4 - Back Pockets
No comments:
Post a Comment