
If you were "period-tailoring" your trousers, you would reinforce the top of the trousers by hand-sewing a length of linen/canvas and then hand-sewing the tops of the pocket pouches to the linen/canvas.

However, we prefer to simply stabilize the top of the trousers with some stay tape, stitching ½" from the top of the trousers (inside the upper seam allowance) with the stay tape centered over the stitch line.

Also note that the trousers' waistband facings are traditionally bias-cut, as evidenced below on these vintage images from The Modern Tailor, Outfitter, and Clothier, Volume 3 and The Art of Garment Making, respectively (see our "Recommended Reading" list):
|
|


Since we have opted to not reinforce the top of our trousers with linen/canvas, even though there is stay tape preventing unwanted stretching, the waistband could arguably still use some additional stabilizing.
One option would be to interface the top of our trousers with some fusible interfacing in place of the linen/canvas, but even in our quest to make Victorian trousers construction as easy and accessible as possible, we couldn't bring ourselves to go quite that far ...

A better method, in our opinion (though doubtless just as sacrilegious to the "period" and bespoke tailors) is to apply a fusible interfacing to the waistband facings instead of the trousers - with the seam allowance trimmed away to avoid creating unnecessary bulk.

(If you find the idea of fusible interfacing too appalling, you can substitute linen/canvas or hair canvas.)
Note that the waistband facings above were cut on the straight grain, rather than the bias. Considering that we're dimensionally stabilizing the waistband facings with fusible interfacing, there's really not much point in going through the trouble of cutting the waistband facings on the bias - beyond the aesthetic, that is!
However, there is an undeniably nice "look" to matching bias-cut waistband facings, as you can see below on our Fifth Doctor trousers:

Cut and interface your waistband facings (pieces D and M) in the manner of your preference.
Sew the front waistband facing (piece D) to the back waistband (piece M) along the side and press the seam allowances open.
Repeat for the other side.
Sew the right and left waistband facing assemblies together along the center back, stopping and reinforcing at the dot (leaving the uppermost ⅝" free).

As usual, for stripes and plaids, every effort should be made to properly align the patterns at the seam lines.

Sew the front and back waistband "curtains" (pieces E and N, respectively) together along the side and press the seam allowances open.
Sew the right and left waistband "curtain" assemblies together along the center back and press the seam allowances open.

(Remember how in our "Required Materials/Accessories/Notions/etc." section we mentioned that you can have some fun with this; as you can see, I used a lightweight cotton fabric with a sheet music print for my trousers' curtains, since I'm a composer and wanted to add a personal touch to my trousers.)
In fact, I'm so obsessive and dedicated that I precisely cut and aligned my "curtains" so the five lines on the music staff exactly matched at the seam lines!


(Obviously, you can decide for yourself how far you want to go with this ...)
Sew the waistband facing assembly to the waistband "curtain" assembly, matching seam lines.
Press the seam allowances open.

If you're making trousers out of herringbone fabric, you (carefully) cut your waistband facings on the straight grain, and you properly aligned your curtains (if necessary), you can achieve a truly "seamless" effect at the center back!

Needless to say, zippers weren't around yet during the Victorian era, so trousers buttoned up the front instead.
That said, the modern "zipper fly" more or less evolved out of the button-fly, so they are fairly similar in their construction.
With our Victorian trousers pattern, we've included two right fly options of the cut-on waistband: one "normal" fly (see lower left), and the other with a "French bearer"-type extension for extra support (see lower right).
|
|

Sew your two right flies (piece I2 or I3) together along the top and longer/curved edges.

 Trim the seam allowances close to the stitch line, notching as needed along the lower curve (and clipping as needed along the upper curve for the "French bearer" fly).
 Turn the right fly outward and press.
Baste or sew the right fly closed along the centermost (raw/open) edges and serge.
If you were "period-tailoring" your trousers, you would reinforce your left fly (piece I1) with linen/canvas.


However, in our opinion, simply reinforcing the left fly with a fusible interfacing works just fine.
Sew two of the left flies (piece I1) together along the top and centermost edges (the centermost edge of the left fly is the straighter of the two longer edges - the opposite of the right fly).
TIP: Use white or lighter interfacings for lighter fabrics, and darker interfacings for darker fabrics. You don't want the mismatched interfacing to be distracting once the buttonholes are slashed/chiseled!
Trim the seam allowances, clipping as necessary around the lower curve.
 Turn the left fly outward and press.
 Then baste or sew the left fly closed along the outer (raw/open) edges and serge.
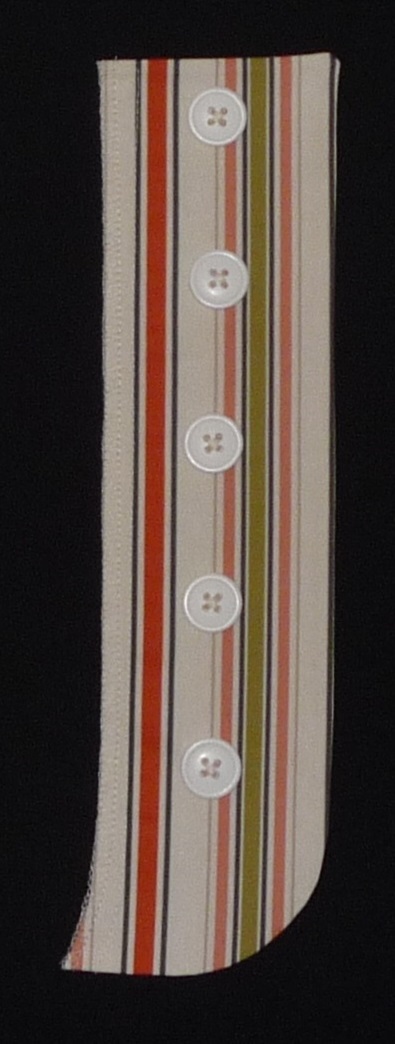
Determine your button/buttonhole placement, attach your buttons, then sew and slash your buttonholes.
We intentionally did not include button positioning on our pattern so you'd be free to choose the size and positioning of your buttons, and to avoid confusing the matter with any lengthening/shortening of the fly in regard to fitting.
(I, for instance, need to extend the trousers upward 1 ½" at the upper fitting line because I'm taller than average and have a long pelvis, as you'll see later in our "Tips for Achieving an Ideal Fit.")
I like to use five ¾" buttons, position the top button 1" from the top of the fly (measured form the center of the button), and then in 2" increments beneath that, with all of them ¾" inside the right fly seam line.
I vertically position my buttonholes likewise, of course, with the centermost edges (or keyholes!) of the buttonholes ¾" from the edge of the left fly.

That said, ½" or ⅝" buttons will also work fine, but I wouldn't go any bigger than that. Also know that metal buttons, while they can be awesome looking (especially for steampunk), can make the fly kind of heavy and cause that area of the trousers to drape oddly.
TIP: Make keyhole buttonholes if you're able to do so! If your machine does not make keyhole buttonholes, regular buttonholes are acceptable, or you can make keyhole buttonholes by hand (Jason MacLochlainn demonstrates this process in his book, The Victorian Tailor - see our "Recommended Reading" section).
TIP: Apply liquid fray preventer to your buttonholes after you slash or chisel them. (Test on a fabric scrap first, though!)
 If you're using the "French bearer" fly for your trousers, make an additional buttonhole at the outer top of the fly.
Sew the remaining, third left fly (piece I1) to the left trousers at the center front, with top and center front edges flush and right sides together, leaving the bottommost ⅝" free.
(If the little curve at the bottom of the fly doesn't align with the trousers' lower front curve, you can either ease it in or simply trim it off. It doesn't matter.)

Sew the right fly assembly to the right trousers at the center front, right sides together, with center front edges flush and the top of the right fly ⅝" beneath the top edge of the trousers, leaving the bottommost ⅝" free.

Sew the waistband facing assembly to the trousers along the top and center edges. This will need to be done in two operations: one for the right side, and one for the left side, with both stitches meeting at the dot at the center back.
(At the centers, stitch again over the previous stitch lines, being sure not to catch the top edge of the right fly in the upper stitching!)

Trim the seam allowances at the corners, and trim the upper waistband facing seam allowances to ¼".
 |
 |
Turn the waistband facings under, poking out the corners as sharply as possible.
Press the top of the trousers, also pressing the left fly "shield" under and the right fly away from center.


Tailor-baste the waistband facings into place around the top of the trousers.

Sew the trousers' fronts closed along the lower center, stopping at the point where the left fly "shield" and the right fly were left free (and not catching them in the stitching).

Press the seam allowances open over a tailor's ham.
As always, every effort should be made to match stripes and plaids at the seam line!
As always, every effort should be made to match stripes and plaids at the seam line!
 |
 |
Turn the trousers around so you're looking at the inner front.
Position the left fly assembly so its upper and centermost edges are flush with those of the trousers, and tailor-baste it securely into place.

Topstitch the left fly into place along the outer edge, through all layers. (This can be done from the inside or outside, but we like to do it from the inside and simply stitch again over the previous stitch line we made when basting/sewing the left fly assembly closed.)
Slip-stitch the top of the left fly to the top of the trousers.

Hand-baste the bottom few inches of the fly area through all layers (catching the right fly, left fly, and trousers).

From the right side, topstitch through all layers along the lowermost few inches of the fly area, securing the right and left flies to the trousers.
To do this, you have several options, but our favorite two are:
 1 - Using the previous stitch line as a guide, make a bar tack slightly below the lowermost button, stitch downward over the previous stitch line, and make another bar tack at the bottom of the fly opening.
OR
 2 - Stitch over the bottommost couple inches or so of the previous stitch line, but also work upward and outward again to "enclose" the entire lower fly area.
TIP: If you have one, use a quilting/even-feed walking foot for this! You'll be sewing through quite a few layers.
Beginning at the left fly topstitch and ending at the right fly seam line, topstitch around the top of the trousers through all layers, 1" from the top edge.


TIP: Again, use a quilting/even-feed walking foot for this! You don't want your multiple layers to shift during the stitch!
If you're using a right fly with "French bearer," hand-sew the corresponding button to the left waistband facing (taking care that your stitches do not go all the way through to the right side of the trousers).

If you want your suspenders to fasten to the outside of your trousers, attach the suspender buttons to the outside (obviously).
These should be positioned approximately 4" apart, with the centermost buttons being approximately 4" from center, and the back buttons beneath the two peaks.


Alternatively, if you wish for your suspenders to fasten to the inside of your trousers, hand-sew the suspender buttons to the waistband facing (again taking care that your stitches do not go all the way through to the right side of the trousers).

NOTE: If you're using a right fly with "French bearer," your extra button for the bearer may need to "double up" as a suspender button as well.
PREVIOUS: Tutorial, part 8 - Center Back
No comments:
Post a Comment