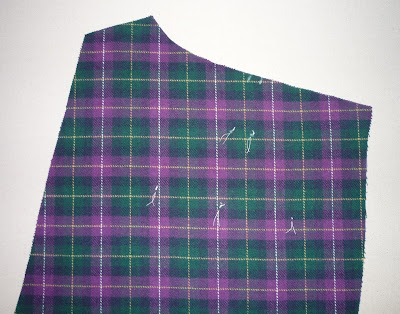
Once you've selected the trousers style you wish to make, cut out the trousers as indicated on the printed pattern, remembering to mark your balance lines where the upper/middle and middle/lower portions of the pattern pieces are joined.
With plaids, every effort should be made to cut the plaids so the horizontal plaid patterns meet at the side seams.
With both stripes and plaids, once you've cut the front and back of one side of the trousers, cut two symmetrical pieces for the other side by placing your cut trousers pieces face down onto your uncut fabric (right sides together), aligning the stripes/plaids as exactly as possible.
By cutting the trousers in this manner, your trousers will be symmetrical and align properly at the center front, sides, and center back. (if the trousers are cut poorly or at random, it will likely be impossible to match the plaids at those seams/intersections.)
It is also important to cut both the right and left flies so the plaids match at the center front.
If you've chosen trousers with a sewn-on waistband with waistband seams and no pleats, carefully cut the front waistband so the plaids match at the top edge of the trousers. (This will not be possible on the back - at least on the grain. Cutting the back waistbands at a diagonal angle is certainly possible but not recommended.)
(If you've chosen a sewn-on wraparound waistband, all we can say is, "Just do the best you can!")
If you've chosen trousers with a sewn-on waistband (with waistband seams) with pleats, it may be impossible to match the plaid pattern at the top of the trousers, since the pleats will shift the pattern.
However, the plaids should match at the front center, "before" the pleats.
(Also note that your waistband will be smaller than the top edge of the trousers, but don't worry! Once the fronts are pleated, the waistband and trousers will have matching seam lines.)
We recommend marking the back darts (and back pocket openings, if you're including back pockets) with "tailor's tacks" - that is, a small loop of basting thread at each of the points:
We also recommend marking the front pleats in the same manner, although we also like to lightly mark them with disappearing tailor's chalk (testing on a scrap first, of course!).
Once your pieces are all cut and marked accordingly, serge the four main trousers panels (right front, right back, left front, and left back), as well as the waistbands (if applicable), waistband facings, curtains, and one left fly.
Give them a good pressing (being careful not to steam away your marks), and we can move on to the actual construction process!


No comments:
Post a Comment